
")
 I chose a shoehorn from the typical beginner's objects for fully sculptural carving such as modeling wood, wooden spoons and shovels or salad servers. It is both decorative and practical. A working drawing is available to registered visitors in the download area of my site.
 Picture 2
Picture 3
Picture 4

Picture 5

Picture 6
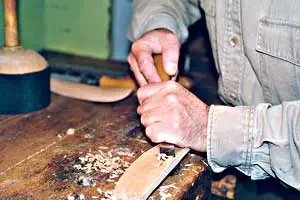
 I chose pearwood as the wood for my shoehorn; it has a beautiful reddish-brown color, is fine-pored and hard. Beginners in particular should make sure that the growth is as straight as possible so that the wood does not offer too much resistance to our efforts to achieve a beautiful symmetrical shape and a profile in which the inner shape of the throat follows the outer shape. After all, a utility object not only has to look good, it also has to feel good! When preparing the work wood you should always remember: keep one, give two away! So cut a few suitable strips with the circular saw and then apply the downloaded (or even better: self-made!) template in front view and side view Transfer workpiece. It is best to drill the hole for the leather strap to hang up our shoe horn in a drill press while the workpiece is still rectangular. You don't have to buy a band saw to saw out the contours; a pendulum jigsaw or, as shown in my photos, a scroll saw can do that too. Even if it is cold, please do not burn the waste immediately! With double-sided adhesive tape or small nails, which can only go through parts that are outside the finished shape, they are still useful when sawing out the second contour, offset by 90 degrees. Our pear wood is too hard to hold in your hand while carving. So everyone has to look for the best possible clamping option in their workshop. For me, optimal means that the workpiece should be at an ergonomic working height. The workpiece should be clamped to the workbench with an intermediate layer made of softer waste wood, as a beginner in particular cannot rule out the possibility of it slipping. For the same reason, clamping should be carried out in such a way that it is virtually impossible for the tool cutting edge to accidentally hit metal clamping parts such as bench hooks, vice jaws, etc. (It's better to re-clamp more often than to grind huge nicks out of the sculptor's chisels!) A single, slightly curved chisel is sufficient for carving. To get the final, smooth and curved shape, we will use rasps and coarse files, and finally sandpaper of different grits. If the shape and surface are ultimately flawless, I recommend wiping the workpiece with a cloth dampened in hot water and, after it has completely dried, sanding all the fibers that have straightened up again as a result of this so-called watering until smooth again. This step is particularly important if coloring is to be done by staining.